
September 28 2026 | 7 Minute Read
When I first moved to Birmingham in 2011, I was buying, renovating, leasing, and selling turnkey rental properties to out-of-state investors. It was a win-win: the buyer received a fully renovated, tenant-occupied, professionally managed rental from day one, cash flowing property, and I made approximately $20,000 per property.
But potential buyers often asked me the same question:
“Why should I buy from you at a premium when I can buy a property myself, hire a contractor, find a tenant, and keep the additional equity and higher cap rate?”
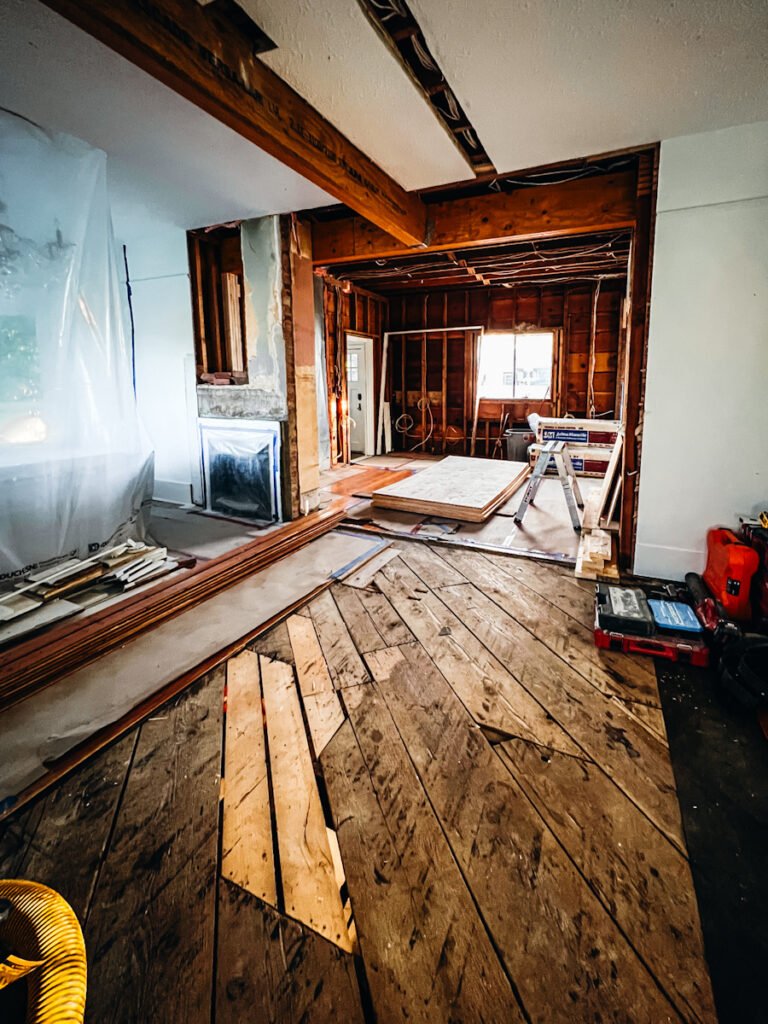
And honestly, they were right.
The problem was that renovating a property from out of state came with one major challenge: finding a reliable contractor.
I’ve heard countless horror stories about local contractors and handymen taking advantage of out-of-state investors. Shoddy work, corners being cut, deposits disappearing, contractors abandoning projects, or even investors being sent photos of someone else’s renovation while their money was collected for work that was never completed.
After hearing enough of these stories, I realized there wasn’t a single local contractor in my market I felt comfortable recommending to another investor.
So, if you’re considering a remote renovation—whether it’s a flip or a rental, here’s my guide to managing the process wisely and avoiding the mistakes I’ve seen other investors make.
Remote rehabs can be profitable, but they require systems. If you can’t physically visit the property, your team becomes your eyes, ears, and hands.
AI has also created a new risk: contractors can manipulate photos to make unfinished work appear complete and collect rehab draws. The best defense is independent verification and a process that makes it difficult to hide problems.
The 16-Step Remote Rehab Process
- Find a licensed home inspector.
- Find a local picture person.
- Get comprehensive photos.
- Complete the home inspection.
- Determine your exit strategy.
- Get sewer and termite inspections.
- Line up financing.
- Schedule regular property check-ins.
- Build a detailed scope of work.
- Find a clean-out crew.
- Find and vet contractors.
- Establish a daily job-site process.
- Tie contractor payments to verified progress.
- Complete a final punch list.
- Conduct a final inspection.
- List the property for sale.
.
1. Get a Third-Party Home Inspection
If you’re putting your own or borrowed money into a property you can’t personally inspect, a licensed third-party inspection is non-negotiable.
A $300–$500 inspection can uncover HVAC, electrical, plumbing, foundation, or other problems that could cost tens of thousands to correct.
Get referrals from agents, property managers, and local investors. Contact several inspectors, compare pricing, verify licensing and insurance, and negotiate a discount if you can provide recurring business.
2. Hire a Local Picture Person
A home inspector isn’t your photographer. You also need someone local who can visit the property, take specific photos, complete walkthrough sheets, install lockboxes, and verify progress.
Typically, this costs about $50–$100 per visit, although rates vary by market.
I find these people through Craigslist, Facebook, and local groups. Screen them carefully for responsiveness, reliability, and attention to detail.
Give them detailed instructions. For example, specify exactly which interior and exterior photos you want, what information to record, and what areas of the property to inspect.
Don’t pay until the work is completed and you’ve received everything requested.
3. Know Your Exit Strategy
Your exit determines your scope of work.
Retail flip: Complete a renovation that matches the best comparable properties and sell at retail value.
Wholetail: Do minimal work—usually a clean-out and perhaps minor repairs—then put the property on the MLS at a discount.
Wholetails can be particularly attractive because you’re taking an off-market property and exposing it to both cash and financed buyers.
Buy & Hold: You are doing a rent-ready renovation keeping costs down. That means no metal roof, granite countertops or installing wood floors. Your focus is to do just enough that it is appealing to prospective tenants while achieving strong cash flow.
4. Know Your Numbers
Don’t overpay and don’t rely on comps alone. Look at what is actually listed and selling in similar condition.
Ask yourself:
- What are comparable properties selling for?
- What are competing properties listed for?
- Is my finished property actually competitive?
- Have I included financing, holding, closing, clean-out, and selling costs?
.
The goal isn’t to make your house the nicest in the neighborhood. It’s to make it a compelling value.
5. Get Sewer and Termite Inspections
These are inexpensive compared with the problems they can uncover.
A sewer scope can identify root intrusion, collapsed lines, and other problems. A $150 inspection could prevent a $10,000–$15,000 surprise.
A termite inspection can identify damage that isn’t visible in photographs. Some lenders and title companies may also require a wood-destroying insect report.
Ask your home inspector, local plumbers, investors, and Facebook groups for referrals.
6. Arrange Financing Before Closing
Get your hard-money or private-money financing lined up before you’re under contract.
Ask lenders:
- How many draws are allowed?
- What triggers an inspection?
- How quickly are draws funded?
- What documentation is required?
.
Have at least two or three lender relationships. A slow draw process can delay a rehab and increase your holding costs.
7. Check the Property Every Day
This may be the most important part of the entire system.
Between closing and the start of work, a vacant property is vulnerable to vandalism, theft, and weather damage.
Once construction begins, have your picture person visit 2-3 times per week. In many markets, you can negotiate a fee of around $35 per visit.
They only need to spend a few minutes taking progress photos and sending them to you.
The cost is minimal compared with hiring a project manager—and the daily accountability can significantly reduce delays and deceptive progress reports.
Your picture person should remain independent. They can be friendly with the contractor, but they shouldn’t become friends or get involved in the project.
8. Build Your Scope of Work From the Comps
Use three to five recent comparable sales within roughly a half-mile when possible. Compare beds, baths, square footage, finishes, flooring, countertops, fixtures, and other features.
Then match the market rather than exceeding it.
Over-improving is one of the easiest ways to destroy your margin. If comparable homes have basic finishes, don’t install expensive upgrades simply because you prefer them.
Create a detailed, room-by-room scope of work that doubles as the contractor’s bid sheet.
Specify exact materials whenever possible. I recommend spending a day at Lowe’s or Home Depot identifying the actual fixtures, faucets, lights, flooring, and other materials you’ll use. Record the SKU numbers and put them in your scope.
Give every contractor the same scope so you’re comparing bids on an apples-to-apples basis.
9. Get Multiple Contractor Bids
Don’t automatically choose the cheapest contractor.
Ask each contractor:
- What’s your price?
- When can you start?
- How long will the job take?
.
Verify licenses and insurance directly with the appropriate state or local agency. Don’t rely on screenshots or documents a contractor sends you.
Ask for addresses of recent projects and before-and-after photos. Then independently verify those properties.
Reviews and referrals matter, but repeat business is an even better signal. If possible, start a new contractor with a smaller job before giving them an entire rehab.
10. Find a Reliable Clean-Out Crew
Facebook Marketplace, local buy/sell groups, and investor groups can be excellent sources.
Get referrals, check reviews, and ask for photos of previous work.
Get one flat price rather than an hourly rate. Then have your picture person verify that the clean-out is complete before releasing payment.
If the crew has its own dump trailer, that can eliminate the need to arrange a separate dumpster.
11. Tie Payments to Verified Progress
Never make large payments based solely on a contractor’s word.
A typical structure might include:
- Material deposit: Paid when the contractor actually starts.
- Rough-in draw: After demolition, framing, and rough mechanical work are verified.
- Finished-work draw: After drywall, paint, flooring, fixtures, and other major work are substantially complete.
- Final holdback: Keep 25% until the punch list is finished.
.
No photos, no verified progress, no payment.
Don’t let a contractor pressure you into releasing the final payment early. The last 10% of a project can take as much effort as the first 90%.
12. Get Lien Waivers
Lien waivers protect you if a contractor fails to pay subcontractors or suppliers.
I’ve personally dealt with a lawsuit involving a supplier who wasn’t paid by my contractor—even though I had already paid the contractor.
If a subcontractor or supplier files a mechanics lien against your property, it can interfere with a sale or refinance.
Get appropriate lien waivers throughout the project and keep your payment records.
13. Establish a Daily Process
The daily process is simple:
- Contractor reports what was completed.
- Picture person visits the property.
- Picture person photographs and verifies the work.
- Compare the work against the scope.
- Address problems immediately.
- Update the budget and timeline.
.
You can also install temporary or permanent cameras for additional security and visibility, but cameras shouldn’t replace a person physically inspecting the property.
14. Complete a Detailed Punch List
Before final payment, have your picture person walk through every room and document anything incomplete.
Create a punch list showing:
- The specific problem
- Its location
- A photograph
- The required correction
- The deadline
.
After the contractor completes the work, have the picture person verify every item.
Don’t release the final payment until the punch list is complete. Once the contractor has been paid in full, your leverage disappears.
15. Get a Final Home Inspection
Have the original inspector return for a final inspection.
They already know the property’s history and can identify problems that developed or were missed during the rehab.
This is inexpensive insurance against a buyer’s inspection uncovering problems after you’re under contract.
Fix issues before listing rather than discovering them during the sale.
16. List the Property
Get professional-quality listing photos, price the property against the same comps you used to build the scope, and clearly describe the improvements.
A flat-fee MLS listing can provide broad exposure without requiring a traditional listing structure.
Price matters. If your property is the best value among comparable listings, buyers will notice it regardless of the market cycle.
The Key Lessons
A remote rehab works when you build a system that eliminates blind spots:
- Get a third-party inspection.
- Use a local picture person as your eyes.
- Check the property every day.
- Build the scope from comparable sales, not personal preferences.
- Get multiple contractor bids.
- Verify licenses, insurance, references, and past work.
- Tie every draw to independently verified progress.
- Keep 25% until the punch list is complete.
- Get lien waivers.
- Conduct a final inspection before listing.
.
Build the system once and you can reuse it on every remote rehab in that market.
For me, the biggest lesson is simple: if you can’t be at the property yourself, pay someone to be there every day. A small daily expense can prevent much larger losses, shorten the project, and give you control over what’s actually happening.